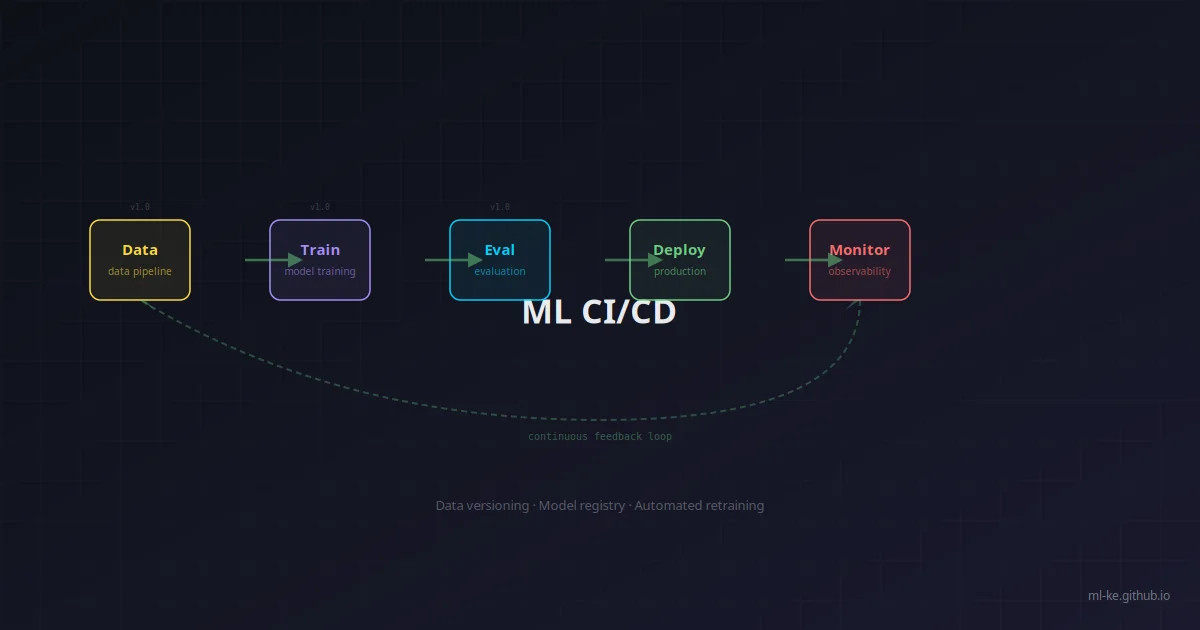
Continuous Integration and Continuous Deployment (CI/CD) for ML is fundamentally different from standard software CI/CD. In software, the same source code produces the same binary every time. In ML, the same training code with the same data can produce slightly different models each run, and the model’s quality depends on both code and data.
This post builds a complete ML CI/CD pipeline using GitHub Actions and MLflow — covering data validation, model training pipelines, the model registry, staged rollouts, A/B testing, and rollback strategies.
The ML CI/CD Pipeline Architecture
1
2
3
4
5
6
7
8
9
10
11
12
13
14
15
16
17
18
19
20
21
22
23
24
| ┌─────────────────────────────────────────────────────────────┐
│ CI Pipeline │
│ │
│ Code Push → Data Validation → Unit Tests → Train Model │
│ │ │
│ ▼ │
│ Evaluate Metrics │
│ │ │
│ metric > threshold? │
│ / \ │
│ No Yes │
│ / \ │
│ Fail PR Register Model │
└─────────────────────────────┬───────────────────────────────┘
│
▼
┌─────────────────────────────────────────────────────────────┐
│ CD Pipeline │
│ │
│ Registry → Stage → Canary (10%) → Monitor → Full Rollout │
│ │ │
│ ▼ │
│ Rollback if drift │
└─────────────────────────────────────────────────────────────┘
|
Step 1: Setting Up MLflow for Experiment Tracking
MLflow is the most widely used open-source ML platform. We’ll use it for experiment tracking and model registry.
Local MLflow Server with PostgreSQL and S3
1
2
3
4
5
6
7
8
9
10
11
| # Start MLflow tracking server
docker run -d --name mlflow-server \
-p 5000:5000 \
-e MLFLOW_TRACKING_URI=postgresql://user:pass@host/mlflowdb \
-e MLFLOW_S3_ENDPOINT_URL=https://s3.amazonaws.com \
-v /mnt/mlflow/artifacts:/mlflow/artifacts \
mlflow/mlflow:latest \
mlflow server \
--backend-store-uri postgresql://user:pass@host/mlflowdb \
--default-artifact-root s3://mlflow-artifacts/ \
--host 0.0.0.0
|
Training Script with MLflow Logging
1
2
3
4
5
6
7
8
9
10
11
12
13
14
15
16
17
18
19
20
21
22
23
24
25
26
27
28
29
30
31
32
33
34
35
36
37
38
39
40
41
42
43
44
45
46
47
48
49
50
51
52
53
54
55
56
57
58
| # train.py
import mlflow
import mlflow.sklearn
from sklearn.ensemble import GradientBoostingClassifier
from sklearn.model_selection import train_test_split
from sklearn.metrics import accuracy_score, precision_score, recall_score
import pandas as pd
import os
# Set tracking URI
mlflow.set_tracking_uri(os.getenv("MLFLOW_TRACKING_URI", "http://localhost:5000"))
mlflow.set_experiment("churn-prediction")
def train_and_register():
with mlflow.start_run() as run:
# Log parameters
mlflow.log_param("model_type", "GradientBoosting")
mlflow.log_param("n_estimators", 200)
mlflow.log_param("max_depth", 6)
mlflow.log_param("learning_rate", 0.1)
# Load and split data
data = pd.read_csv("data/training_data.csv")
X = data.drop("churn", axis=1)
y = data["churn"]
X_train, X_test, y_train, y_test = train_test_split(
X, y, test_size=0.2, random_state=42
)
# Train model
model = GradientBoostingClassifier(
n_estimators=200,
max_depth=6,
learning_rate=0.1,
)
model.fit(X_train, y_train)
# Evaluate
y_pred = model.predict(X_test)
metrics = {
"accuracy": accuracy_score(y_test, y_pred),
"precision": precision_score(y_test, y_pred),
"recall": recall_score(y_test, y_pred),
}
mlflow.log_metrics(metrics)
# Log the model
mlflow.sklearn.log_model(model, "model")
# Register model in MLflow Model Registry
model_uri = f"runs:/{run.info.run_id}/model"
mlflow.register_model(model_uri, "churn-prediction")
return metrics
if __name__ == "__main__":
metrics = train_and_register()
print(f"Training complete. Metrics: {metrics}")
|
Step 2: Data Validation
Before training, validate your data. This catches issues like schema drift, missing values, or corrupted features before they waste GPU time.
1
2
3
4
5
6
7
8
9
10
11
12
13
14
15
16
17
18
19
20
21
22
23
24
25
26
| # validate_data.py
import pandera as pa
import pandas as pd
# Define the expected schema
schema = pa.DataFrameSchema({
"age": pa.Column(int, checks=pa.Check.in_range(18, 100)),
"income": pa.Column(float, checks=pa.Check.greater_than(0)),
"tenure_months": pa.Column(int, checks=pa.Check.in_range(0, 600)),
"churn": pa.Column(int, checks=pa.Check.isin([0, 1])),
"num_transactions": pa.Column(int, checks=pa.Check.greater_than_or_equal_to(0)),
})
def validate_data(path: str) -> bool:
try:
df = pd.read_csv(path)
validated_df = schema.validate(df, lazy=True)
print(f"✓ Data validated: {len(validated_df)} rows passed")
return True
except pa.errors.SchemaErrors as e:
print(f"✗ Data validation failed:\n{e}")
return False
if __name__ == "__main__":
success = validate_data("data/training_data.csv")
exit(0 if success else 1)
|
Step 3: GitHub Actions CI Pipeline
Here’s a complete GitHub Actions workflow that triggers on PRs and pushes to main:
1
2
3
4
5
6
7
8
9
10
11
12
13
14
15
16
17
18
19
20
21
22
23
24
25
26
27
28
29
30
31
32
33
34
35
36
37
38
39
40
41
42
43
44
45
46
47
48
49
50
51
52
53
54
55
56
57
58
59
60
61
62
63
64
65
66
67
68
69
70
71
72
73
74
75
76
77
78
79
80
81
82
83
| # .github/workflows/ml-pipeline.yml
name: ML Training Pipeline
on:
push:
branches: [main]
pull_request:
branches: [main]
paths:
- 'models/**'
- 'training/**'
- 'data/**'
jobs:
validate:
runs-on: ubuntu-latest
steps:
- uses: actions/checkout@v4
- uses: actions/setup-python@v5
with:
python-version: '3.11'
- name: Install dependencies
run: pip install pandas pandera pyyaml
- name: Validate training data
run: python validate_data.py --path data/training_data.csv
- name: Validate configuration schema
run: python validate_config.py --path config/training.yaml
test:
needs: validate
runs-on: ubuntu-latest
steps:
- uses: actions/checkout@v4
- uses: actions/setup-python@v5
with:
python-version: '3.11'
- name: Install test dependencies
run: pip install pytest pytest-cov
- name: Run unit tests
run: pytest tests/ --cov=models/ --cov-report=xml
- name: Upload coverage
uses: codecov/codecov-action@v3
train:
needs: test
runs-on: ubuntu-latest
steps:
- uses: actions/checkout@v4
- uses: actions/setup-python@v5
with:
python-version: '3.11'
- name: Install dependencies
run: pip install -r requirements.txt
- name: Train and register model
env:
MLFLOW_TRACKING_URI: ${{ secrets.MLFLOW_TRACKING_URI }}
AWS_ACCESS_KEY_ID: ${{ secrets.AWS_ACCESS_KEY_ID }}
AWS_SECRET_ACCESS_KEY: ${{ secrets.AWS_SECRET_ACCESS_KEY }}
run: python train.py --config config/training.yaml
- name: Upload trained model artifact
uses: actions/upload-artifact@v4
with:
name: trained-model
path: model_output/
evaluate:
needs: train
runs-on: ubuntu-latest
steps:
- uses: actions/checkout@v4
- name: Compare with champion model
env:
MLFLOW_TRACKING_URI: ${{ secrets.MLFLOW_TRACKING_URI }}
run: |
champion_metrics=$(mlflow models evaluate \
--model-uri "models:/churn-predection/Production" \
--test-data data/test_data.csv)
challenger_metrics=$(python evaluate.py --run-id latest)
python promote_if_better.py \
--champion "$champion_metrics" \
--challenger "$challenger_metrics" \
--metric accuracy \
--threshold 0.02
|
Step 4: The Model Registry — Managing Model Versions
The MLflow Model Registry is the source of truth for model versions. Each registered model has stages:
| Stage | Purpose | Auto-Deploy? |
|---|
| None | Just registered, unassigned | No |
| Staging | Ready for QA/staging validation | Yes (staging env) |
| Production | Currently serving traffic | Yes (production) |
| Archived | No longer in use | No |
1
2
3
4
5
6
7
8
9
10
11
12
13
14
15
16
17
18
19
20
21
22
| # Register a new model version
mlflow models register \
--model-uri "runs:/abc123/model" \
--name "churn-prediction"
# List all versions
mlflow models list --name "churn-prediction"
# Transition to staging (automated by CI)
mlflow models transition-stage \
--model-version 5 \
--stage Staging
# After QA approval, transition to production
mlflow models transition-stage \
--model-version 5 \
--stage Production
# Archive old production version
mlflow models transition-stage \
--model-version 4 \
--stage Archived
|
Programmatic Stage Management
1
2
3
4
5
6
7
8
9
10
11
12
13
14
15
16
17
18
19
20
21
22
23
24
25
26
| # Promote to production based on metrics
from mlflow.tracking import MlflowClient
client = MlflowClient()
def promote_to_production(model_name: str, version: int) -> dict:
"""Promote a model to production and archive the current one."""
# Get current production version
current_prod = client.get_latest_versions(model_name, stages=["Production"])
# Transition new version to production
client.transition_model_version_stage(
name=model_name,
version=version,
stage="Production"
)
# Archive old production version
for old_version in current_prod:
client.transition_model_version_stage(
name=model_name,
version=old_version.version,
stage="Archived"
)
return {"new_production": version, "archived": [v.version for v in current_prod]}
|
Step 5: Staged Rollouts
Don’t push a new model to 100% of traffic immediately. Use staged rollouts:
1
2
3
4
5
| ┌─────────┐ ┌──────────┐ ┌─────────┐ ┌──────────┐
│ Staging│ ──→ │ Canary │ ──→ │ Rolling │ ──→ │ Full │
│ 5% │ │ 10-25% │ │ 50-75% │ │ 100% │
│ QA only │ │ Internal │ │ All users│ │ Stable │
└─────────┘ └──────────┘ └─────────┘ └──────────┘
|
Implementing Staged Rollouts with Kserve
1
2
3
4
5
6
7
8
9
10
11
12
13
14
15
16
17
18
19
20
21
22
| # staged-rollout.yaml
apiVersion: "serving.kserve.io/v1beta1"
kind: "InferenceService"
metadata:
name: "churn-prediction"
spec:
predictor:
# Champion model (current)
default:
storageUri: "s3://models/churn-prediction/version-4"
resources:
nvidia.com/gpu: 0
cpu: "1"
memory: "2Gi"
# Challenger model (new)
canary:
storageUri: "s3://models/churn-prediction/version-5"
resources:
nvidia.com/gpu: 0
cpu: "1"
memory: "2Gi"
trafficPercent: 10 # Start with 10%
|
Step 6: A/B Testing Models
Beyond staged rollouts, A/B testing compares model versions statistically:
1
2
3
4
5
6
7
8
9
10
11
12
13
14
15
16
17
18
19
20
21
22
23
24
25
26
27
28
29
30
31
32
33
34
35
36
37
38
39
40
41
42
43
44
| # ab_test.py
import numpy as np
from scipy import stats
import logging
logger = logging.getLogger(__name__)
def evaluate_ab_test(
control_metrics: dict,
treatment_metrics: dict,
metric: str = "accuracy",
min_improvement: float = 0.01,
) -> dict:
"""
Compare A/B test results between champion (control) and challenger (treatment).
Returns recommendation on whether to promote.
"""
control_mean = control_metrics[metric]
treatment_mean = treatment_metrics[metric]
improvement = treatment_mean - control_mean
# Statistical significance test (two-sample z-test for proportions)
n_control = control_metrics.get("n_samples", 1000)
n_treatment = treatment_metrics.get("n_samples", 1000)
p_pool = (control_mean * n_control + treatment_mean * n_treatment) / \
(n_control + n_treatment)
se = np.sqrt(p_pool * (1 - p_pool) * (1/n_control + 1/n_treatment))
if se == 0:
return {"promote": False, "reason": "Insufficient data"}
z_stat = improvement / se
p_value = 2 * (1 - stats.norm.cdf(abs(z_stat)))
promote = improvement >= min_improvement and p_value < 0.05
return {
"promote": promote,
"improvement": round(improvement, 4),
"p_value": round(p_value, 4),
"significant": p_value < 0.05,
"recommendation": "Promote" if promote else "Keep champion",
}
|
A/B Test Traffic Split in Practice
1
2
3
4
5
6
7
8
9
10
11
12
13
14
15
16
17
18
19
20
21
22
23
24
| # Using Istio for traffic splitting (works with Kserve)
apiVersion: networking.istio.io/v1beta1
kind: VirtualService
metadata:
name: churn-prediction-ab
spec:
hosts:
- churn-prediction.kserve.svc.cluster.local
http:
- match:
- headers:
x-ab-variant:
exact: challenger
route:
- destination:
host: churn-prediction-challenger
weight: 100
- route:
- destination:
host: churn-prediction-champion
weight: 90
- destination:
host: churn-prediction-challenger
weight: 10
|
Step 7: Rollback Strategies
When a deployment goes wrong, you need to roll back fast. There are three rollback strategies:
1. Registry Rollback (Recommended)
Roll back the model registry stage, and the CD pipeline redeploys the previous version:
1
2
3
4
5
6
7
| # Promote old version back to production
mlflow models transition-stage \
--model-version 4 \
--stage Production
# The CD pipeline detects the stage change and redeploys
# This triggers: ArgoCD / Flux / Helm rollback
|
2. Kubernetes Rollback
If the deployment is healthy but the model is bad, use Kubernetes rollback:
1
2
3
4
5
6
7
8
| # Rollback the last deployment revision
kubectl rollout undo deployment/churn-prediction-predictor
# Rollback to a specific revision
kubectl rollout undo deployment/churn-prediction-predictor --to-revision=3
# Check rollout history
kubectl rollout history deployment/churn-prediction-predictor
|
3. Automated Rollback with Guardrails
Monitor metrics during rollout and trigger automated rollback:
1
2
3
4
5
6
7
8
9
10
11
12
13
14
15
16
17
18
19
20
21
22
23
24
25
26
27
28
29
30
31
32
33
34
35
| # auto_rollback.py (runs as a sidecar during deployment)
import time
import requests
import subprocess
MONITORING_URL = "http://prometheus:9090/api/v1/query"
DEPLOYMENT_NAME = "churn-prediction"
THRESHOLD_ERROR_RATE = 0.05 # 5% error rate
THRESHOLD_LATENCY_P99 = 2.0 # 2 seconds
ROLLOUT_TIMEOUT = 600 # 10 minutes
def query_prometheus(query: str) -> float:
resp = requests.get(MONITORING_URL, params={"query": query})
data = resp.json()
return float(data["data"]["result"][0]["value"][1])
def should_rollback() -> bool:
error_rate = query_prometheus(
f'sum(rate(request_count{{deployment="{DEPLOYMENT_NAME}",status=~"5.."}}[5m])) / '
f'sum(rate(request_count{{deployment="{DEPLOYMENT_NAME}"}}[5m]))'
)
latency_p99 = query_prometheus(
f'histogram_quantile(0.99, '
f'sum(rate(request_latency_bucket{{deployment="{DEPLOYMENT_NAME}"}}[5m])) by (le))'
)
return error_rate > THRESHOLD_ERROR_RATE or latency_p99 > THRESHOLD_LATENCY_P99
# Monitor during rollout
start = time.time()
while time.time() - start < ROLLOUT_TIMEOUT:
if should_rollback():
subprocess.run(["kubectl", "rollout", "undo", f"deployment/{DEPLOYMENT_NAME}"])
print("Automated rollback triggered!")
break
time.sleep(30)
|
Putting It All Together: A Complete CI/CD Run
Here’s what happens when a data scientist pushes a new training configuration:
1
2
3
4
5
6
7
8
9
10
11
12
13
14
15
16
17
18
19
20
21
22
23
24
25
| 1. Push to feature/dnn-classifier branch
2. GitHub Actions triggers CI pipeline:
├── validate_data → ✓ 50,000 rows valid
├── pytest → ✓ 47/47 tests passed
├── train_model → Run abc123, accuracy=0.894
└── compare_with_production → accuracy 0.894 > 0.872 (champion)
└── Automatically registers model version 6
3. MLflow → Model version 6 registered in "Staging"
4. ArgoCD detects new Staging version → deploys to staging cluster
5. QA runs validation on staging endpoint:
├── Integration tests → ✓
├── Load test → 500 req/s, p99=230ms
└── Drift check → No significant drift
6. Developer promotes to "Production" in MLflow UI
7. ArgoCD/Kserve detects stage change:
├── Canary (10% traffic) → Monitors for 1 hour
├── No errors detected → Gradual ramp-up
└── Full rollout (100%)
8. Model version 4 is archived
|
Checklist for ML CI/CD
- Data validation runs before every training job
- Model registry tracks all versions with metrics
- Staged rollouts (staging → canary → production)
- Automated rollback based on error rate and latency
- A/B testing framework for statistical comparison
- Reproducibility — pin data version, code commit, and hyperparameters
- Notification on failures (Slack, email, PagerDuty)
Summary
ML CI/CD is not just “run git push and deploy.” You need data validation, experiment tracking, model registry management, staged rollouts, and rollback automation. The payoff is significant:
- No more manual model deployments — the pipeline handles it
- Every model is reproducible — pinned data, code, and config
- Safe rollouts — canary deployments catch issues before they affect all users
- Fast rollbacks — seconds, not hours
In the final post of this series, we’ll cover monitoring ML systems in production — what to watch for after the model is live.